Why Deploy a Solana SPL Token on Devnet First?
The Solana blockchain is well-known for its speed and extremely low fee profile. However, creating and launching a token on the Mainnet environment still requires a small amount of real SOL to pay for account rent and on-chain Metaplex metadata uploads. If you are a developer, an entrepreneur, or just experimenting with tokenomics, launching a token on Mainnet first can be an unnecessary financial risk.
To solve this, Solana offers the Devnet and Testnet environments. These are identical replicas of the main blockchain but utilize testnet SOL that is distributed 100% free of charge via secure faucets. By utilizing MinTools' advanced developer testing suite on Devnet, you can configure, deploy, and inspect your custom SPL token for free before spending a single real cent.
Step-by-Step: Switch Your Phantom or Solflare Wallet to Devnet
To interact with test networks, you must first enable developer settings inside your Web3 wallet. Here is how to configure Phantom wallet:
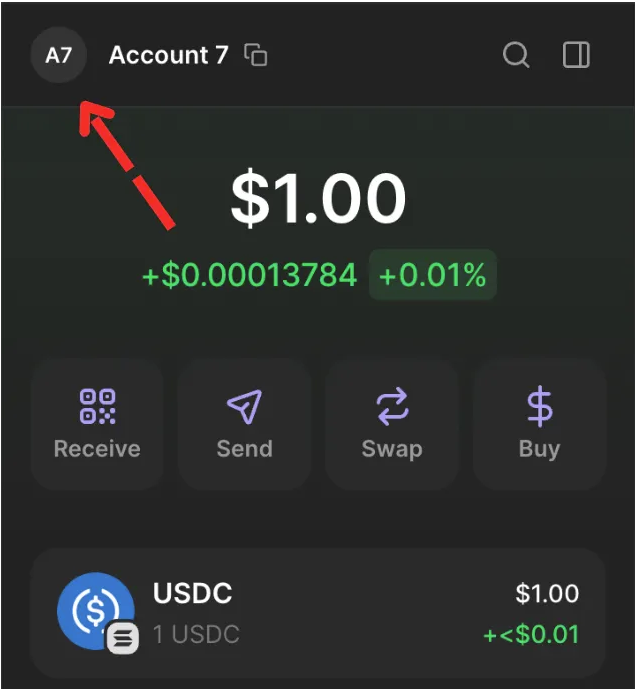
Step 1: Open your Phantom wallet extension or browser app, and click the Account Avatar in the top-left corner.
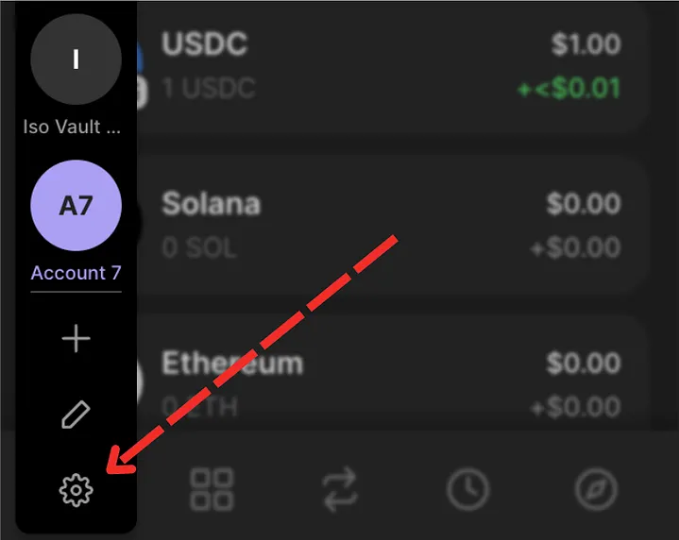
Step 2: A side drawer menu will appear. Click the Settings Gear Icon located at the bottom-left of the drawer.
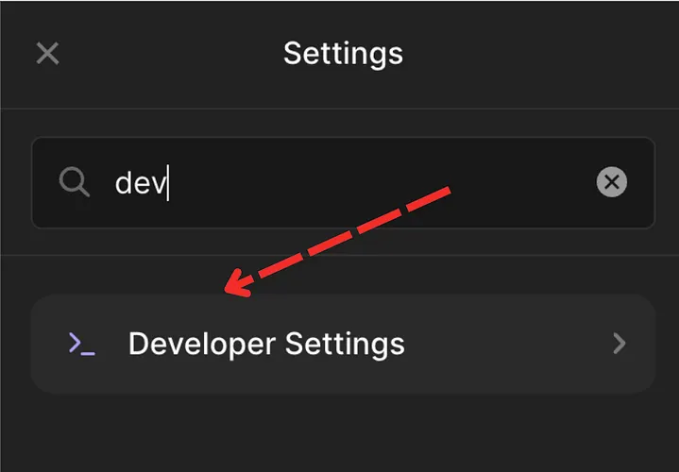
Step 3: Scroll down the settings list or use the search bar to type "dev". Click on "Developer Settings".
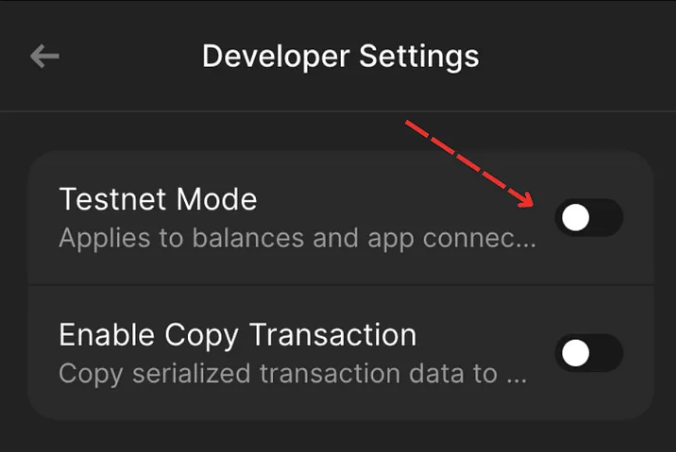
Step 4: Locate the "Testnet Mode" toggle and switch it to "ON". Your wallet is now actively listening to Solana's developer testnet!
Step-by-Step: Unlock and Enable Devnet on MinTools
By default, MinTools hides testnet controls to prevent production users from making accidental testnet transactions. We offer two elegant, secure methods to unlock our complete developer suite:
Step A: Direct URL Parameter (Easiest Method)
Simply append `?network=devnet` to the URL in your browser's search bar. For example, navigate directly to [https://mintools.io/create-token?network=devnet](/create-token?network=devnet). MinTools will automatically detect this URL parameter, save your developer preference in secure local storage, and switch the entire platform's network connection to Devnet instantly.
Step B: Using the Header Status Toggle
Click the green "Mainnet" badge located in the top-right header (or inside the mobile menu drawer on smaller screens). This action opens the Advanced Network panel. Click the "Enable Devnet" button. This unlocks the toggle, allowing you to click the button to switch network clusters. Once clicked, the badge will glow with a premium blue "Devnet" label, indicating all actions are fully safe and free.

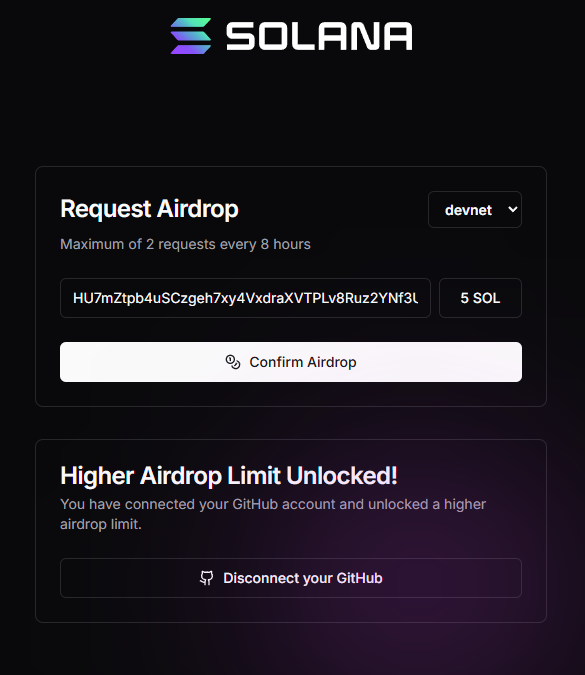
Step-by-Step: Request Free SOL via a Solana Faucet
To cover the network fee and storage rent for your SPL token creation on Devnet, you need free test SOL. Follow these steps to request it:
Step 1: Open your wallet extension and copy your Solana address to your clipboard.
Step 2: Visit a trusted web-based Solana Devnet Faucet such as [Solana Faucet](https://faucet.solana.com/) or [Solfaucet](https://solfaucet.com).
Step 3: Paste your wallet address into the recipient address field, select the amount of SOL you require (1 SOL or 2 SOL is recommended), and click the "Airdrop" button.
Step 4: Check your wallet balance after a few seconds. You will see your balance update with your newly received test SOL. Note that devnet faucets sometimes have daily limits to prevent spam.
Step-by-Step: Create and Customize Your Free SPL Token
Now that your wallet is on Devnet and funded with test SOL, you are ready to launch your custom token:
Step 1: Navigate to the [Create Token](/create-token) page. Ensure that the blue "Devnet" status badge is active in the top header.
Step 2: Define your metadata. Enter a custom Token Name (e.g., "Dev Token") and Symbol (e.g., "DEVT"). Set your Total Supply (1,000,000 is standard for testing) and Decimals (9 decimals is the network standard).
Step 3: Upload your Token Logo image. MinTools will automatically optimize and upload your logo to decentralized IPFS storage free of charge, ensuring permanent explorer compatibility.
Step 4: Configure advanced authorities. You can choose to toggle off Freeze Authority or Mint Authority. Testing these options allows you to understand how security scanners respond to your token.
Step 5: Review the creation summary and click "Create Token". Approve the transaction in your Phantom wallet. Within seconds, your token is officially deployed on the Solana Devnet blockchain!
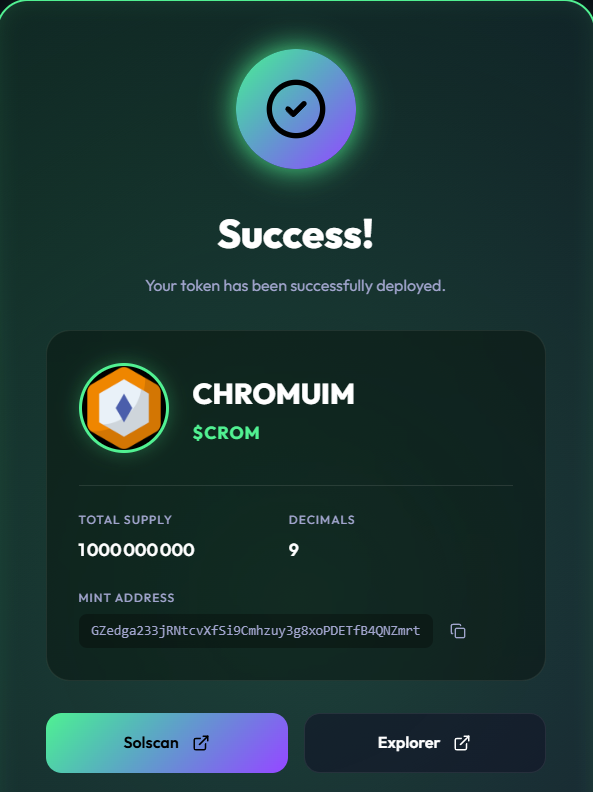
Verify and Scan Your Newly Minted Token
After deployment, verify your token's configuration using these tools:
• Solana Explorer: Copy your token mint address from the success modal. Go to [Solana Explorer](https://explorer.solana.com/) and paste the address into the search bar. Ensure "Devnet" is selected in the network dropdown at the top right to inspect transaction history and metadata.
• MinTools Token Scanner: Copy your mint address and go to our built-in [Token Risk Scanner](/scanner). Paste the address and run an audit. The scanner will verify your authority lock status, liquidity settings, and metadata details, giving you a real-world preview of your project's trust score before you deploy on Mainnet!
Frequently Asked Questions
Q: Can I sell or convert Devnet SOL and test tokens for real money?
A: No. Solana Devnet and Testnet are simulated environments built exclusively for testing, debugging, and learning. The SOL and custom tokens created here have zero real-world value and cannot be swapped for real mainnet funds.
Q: Why does my wallet display an "Unable to switch network" error?
A: Ensure that you have enabled "Testnet / Devnet Mode" in your Phantom developer settings first. If your wallet is restricted to Mainnet only, it will reject any transaction requests coming from a Devnet-connected application.
Q: What is the main difference between Solana Devnet and Testnet?
A: Solana Devnet is the playground for web3 developers to build and test applications and tokens. Solana Testnet is primarily used by the Solana validator community to test network upgrades, performance, and stability. For SPL token testing, Devnet is the standard choice.
Q: How do I migrate my tested token to Solana Mainnet?
A: Once you are 100% satisfied with your token configuration, simply switch the network status badge back to "Mainnet" in the top-right header, connect your wallet with real SOL, and deploy the official version on the Mainnet environment.